How to Replace a Light Switch – Replacing a light switch is one of the most common and useful DIY electrical tasks homeowners can learn. Whether your switch is outdated, broken, or you simply want to upgrade to a modern style, learning how to replace a light switch can save you money and improve the functionality of your home. Many people assume electrical work is complicated, but with the right guidance, tools, and safety precautions, this project is surprisingly simple.
In this comprehensive guide, you will learn everything you need to know about replacing a light switch safely and efficiently. From understanding different types of switches to step-by-step installation instructions, this article will help beginners and experienced DIY enthusiasts alike.
Why You Might Need to Replace a Light Switch
There are several reasons why you might need to replace a light switch. One of the most common reasons is wear and tear. Over time, switches can become loose, cracked, or stop functioning properly. A faulty switch may flicker, feel warm to the touch, or fail to turn lights on and off reliably.
Another reason is upgrading your home’s appearance. Modern switches come in sleek designs and colors that match updated interiors. You may also want to install smart switches, dimmer switches, or motion sensor switches for convenience and energy savings.
Sometimes, replacing a switch is necessary for safety. If a switch sparks, makes buzzing noises, or smells burnt, it could indicate damaged wiring. In such cases, replacing the switch promptly can help prevent electrical hazards.
Tools and Materials You Will Need
Before you begin, gather all the necessary tools and materials. Having everything ready will make the process smoother and safer. You will need a new light switch, a screwdriver, wire stripper, voltage tester, and electrical tape. In some cases, needle-nose pliers may also be helpful.
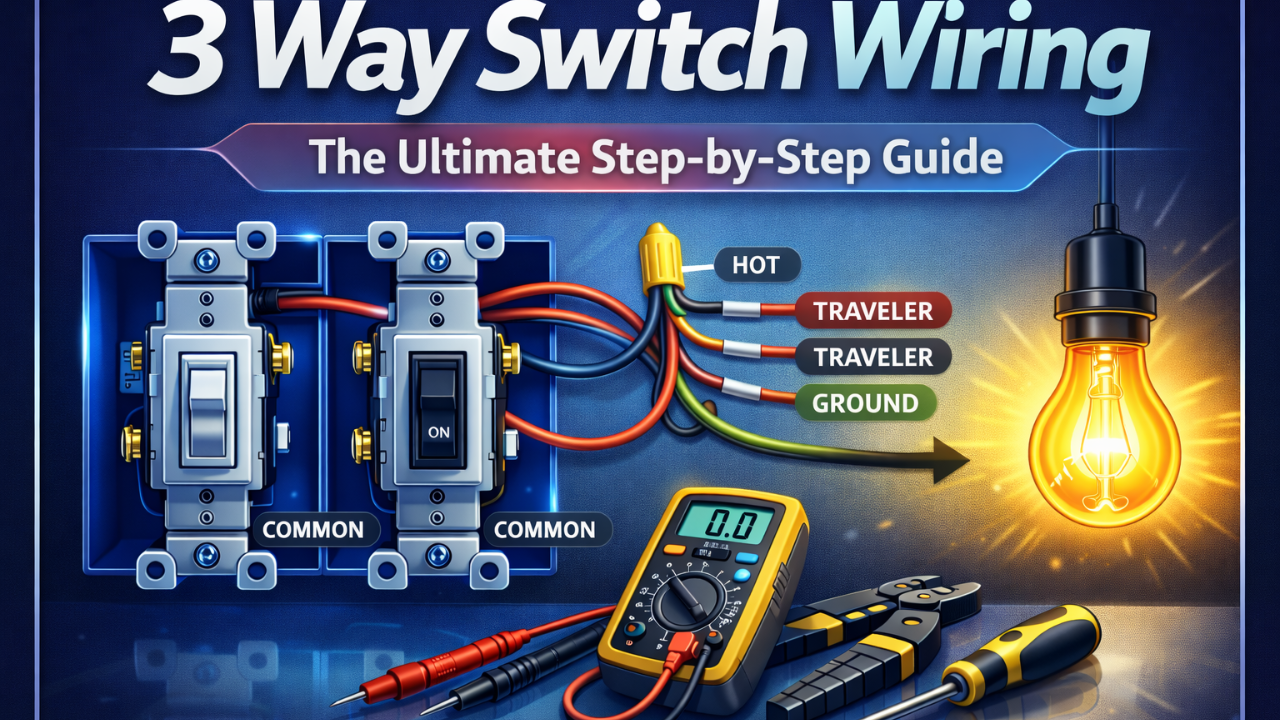
It is important to choose the correct type of replacement switch. The most common type is a single-pole switch, which controls a light from one location. If your light is controlled from two locations, you will need a three-way switch instead. Matching the correct switch type ensures proper operation.

Safety Precautions Before Starting
Safety is the most important step when working with electricity. Always turn off the power at the circuit breaker before removing the switch. Never rely solely on turning off the light using the switch itself.
After turning off the breaker, use a voltage tester to confirm that no electricity is flowing to the switch. This step ensures your safety and prevents electrical shock. Wear rubber-soled shoes and avoid working in damp areas to reduce risk.
It is also helpful to take a photo of the existing wiring before disconnecting anything. This will serve as a reference when connecting the new switch.
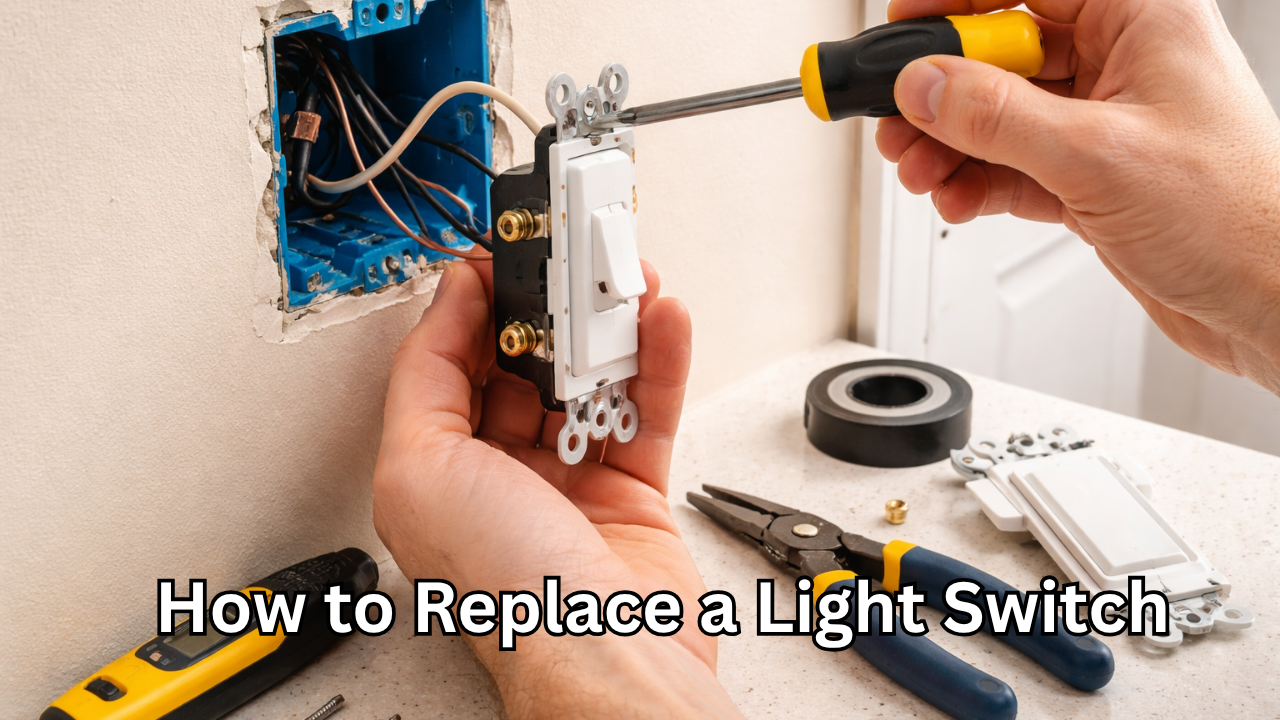
Step-by-Step Guide to Replace a Light Switch
First, turn off the power at the breaker box. Once you are sure the electricity is off, remove the switch cover plate using a screwdriver. Set the screws aside so you do not lose them.
Next, unscrew the mounting screws holding the switch in place. Gently pull the switch out from the electrical box, being careful not to touch the wires directly. Use your voltage tester again to confirm no power is present.
Observe how the wires are connected to the old switch. Typically, there will be two hot wires and one ground wire. The ground wire is usually green or bare copper. Loosen the screws and disconnect the wires from the old switch.
Prepare the new switch by loosening its terminal screws. Attach the ground wire to the green screw on the new switch. Then connect the remaining wires to the brass screws. Make sure the connections are tight and secure.
Carefully push the wires back into the electrical box. Align the switch and secure it using mounting screws. Finally, attach the cover plate and tighten the screws.
Turn the power back on at the breaker and test the switch. If the light turns on and off properly, your installation is successful.
Understanding Different Types of Light Switches
There are several types of light switches available. A single-pole switch is the most common and controls a light from one location. A three-way switch allows control from two different locations, such as at the top and bottom of stairs.
A four-way switch is used when a light is controlled from three or more locations. Dimmer switches allow you to adjust brightness levels, creating ambiance and saving energy. Smart switches connect to Wi-Fi and can be controlled using a smartphone or voice assistant.
Knowing which switch you need helps ensure compatibility and proper function. Always check your existing wiring before purchasing a replacement.
Common Mistakes to Avoid
One of the most common mistakes is forgetting to turn off the power. This can lead to serious injury. Always double-check with a voltage tester before touching wires.
Another mistake is mixing up wire connections. Incorrect wiring can cause the switch to malfunction. Taking a photo beforehand helps prevent confusion.
Over-tightening screws can also damage the switch or wires. Tighten them firmly but not excessively. Additionally, avoid forcing wires into the electrical box. Arrange them neatly to prevent damage.
When to Call a Professional
While replacing a light switch is usually simple, there are situations where calling a professional electrician is best. If you see multiple wires and cannot identify them, it may indicate complex wiring.
If your home has aluminum wiring or the electrical box is damaged, professional assistance is recommended. Additionally, if the switch controls multiple lights and does not function after replacement, an electrician can diagnose the issue safely.
Knowing your limits is important. Safety should always come first.
Benefits of Replacing a Light Switch Yourself
Replacing a light switch yourself offers several benefits. It saves money on electrician service fees. It also allows you to upgrade your home quickly without waiting for appointments.
DIY projects build confidence and improve your home maintenance skills. You also gain better understanding of your electrical system, which can be helpful for future tasks.
Another advantage is customization. You can choose stylish switches that match your décor or install smart technology for convenience.
Tips for a Professional Finish
To achieve a clean and professional look, make sure the switch is aligned properly before tightening screws. Use a level if necessary to keep it straight.
Choose a cover plate that matches your wall color and design. Wipe the area clean after installation to remove fingerprints and dust.
If upgrading multiple switches, maintain consistency throughout your home. Matching switches create a polished and cohesive appearance.
Troubleshooting After Installation
If the switch does not work after installation, turn off the power again and check the wiring. Ensure all connections are tight and correctly placed.
If the light flickers, the wires may be loose. Tighten them carefully. If the breaker trips, there may be a short circuit. Double-check that wires are not touching each other improperly.
Sometimes the issue may be with the light fixture or bulb rather than the switch. Testing with another bulb can help identify the problem.
Final Thoughts
Learning how to replace a light switch is a valuable skill that every homeowner should know. It is a simple project that improves safety, functionality, and appearance. By following proper safety precautions and step-by-step instructions, you can complete this task confidently.
Whether you are replacing a faulty switch or upgrading to a modern design, the process is straightforward and rewarding. With minimal tools and a little patience, you can successfully replace a light switch and enhance your home.
Taking on small DIY electrical projects like this not only saves money but also empowers you to maintain your living space efficiently. Start with one switch, and you will quickly gain the confidence to tackle more home improvement tasks.
Also Read: How to Fix Squeaky Floors: A Complete Step-by-Step Guide for Quiet and Solid Flooring
One thought on “How to Replace a Light Switch: A Complete Step-by-Step Guide for Beginners”
Comments are closed.